You may remember back a year or so ago (I just barely remember it) when we snagged ourselves a free grain bin.
We managed to get it all back to our farm in pieces, and then sometime this summer the real work began: putting the darned thing back together again.
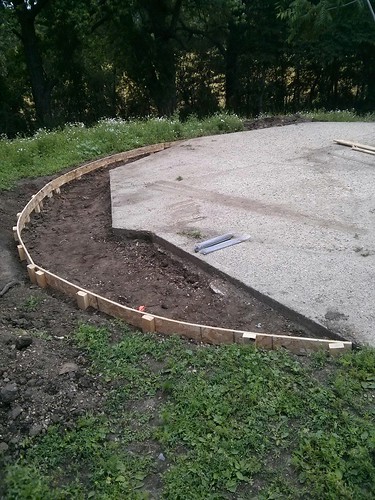
The first problem is that the concrete pad that formerly hosted a grain bin was not quite the right size for our 18′ bin. Nothing a little forming and two dozen or so bags of concrete mix can’t fix.
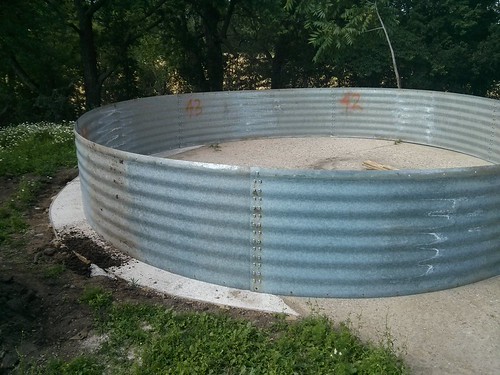
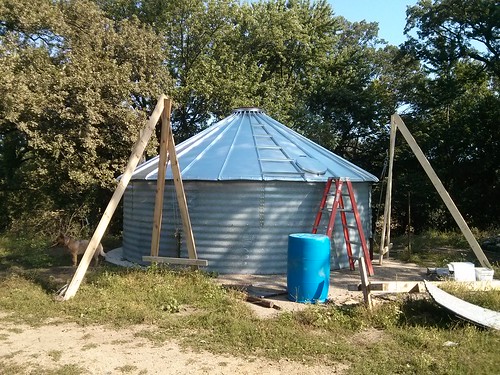
Then begins assembly. We have a bin that’s 5 rings high, so being slightly ambitious (and having no idea what I was doing), I started with the 4th ring.
The process of building a grain bin is a bit odd. You assemble the top bits first, lift them all up into the air and then bolt the lower rings on one at a time.
Somewhere along the way we had to harvest our barley, which was meant to go in our yet-to-be-completed grain bin. Our neighbor was kind enough to rent us his bin for a while (until he harvests his soybeans) so we bought ourselves a little more time to build our bin.
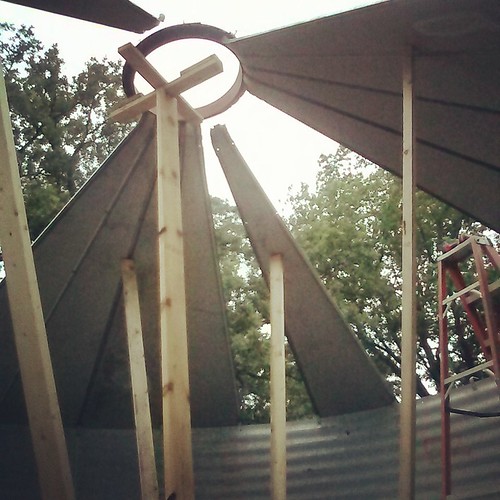
The roof was the tricky part. All those little “slices” of roof are held up by the tension on the center ring. Getting all that lined up 12′ above the ground without the 25# center ring coming crashing down on your head was quite a feat. It probably would have been a lot easier to start with the #5 ring so the roof wasn’t quite so high up off the ground for assembly. Oh well.
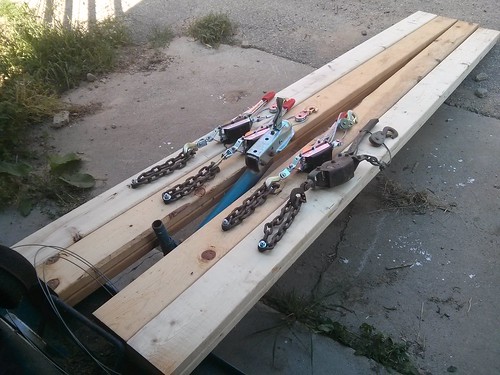
The local grain-bin supply place charges an arm and a leg to rent their bin jacks, $50/jack/day. We built our own redneck bin jacks for less than $50 each and we get them for as many days as we want. For those interested, the parts list for a bin jack goes something like this: Two 2x6x10′, one 2x6x12′, one 2x4x4′, one come-along, one 3/8″x4″ carriage bolt, one 3′ length of chain.
Now it really starts to look like something. Especially once the rusty roof is painted with some aluminum roof paint. Protip: get a cheap paint sprayer for the aluminum paint, it goes on really fast & even that way.
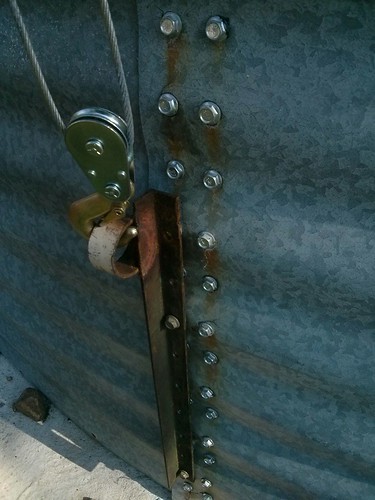
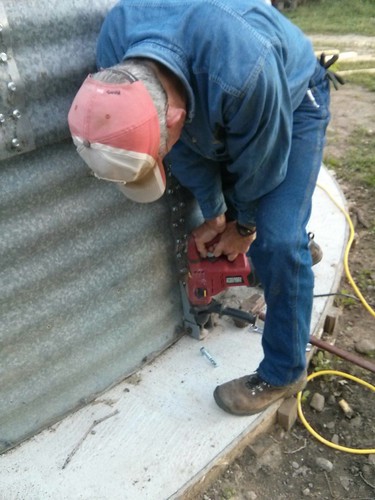
With all the bin jacks set up, it’s time to get them something to fasten to. The rental bin jacks came with a bit of 2-3″ angle iron that had a hole plasma-cut into it for the hooks. Being tragically devoid of a plasma cutter, I settled for welding a 1″ slice of pipe to a piece of angle iron.
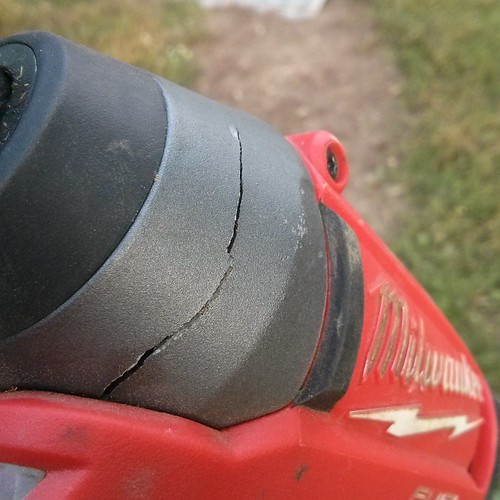
Somewhere along the line my impact driver quit in protest of all those 1/2″ bolts. Still don’t have the darn thing back from the repair place. Waiting on a part they say…
Anyway, putting all the rest of the rings on goes pretty quickly. Jack the bin up, bolt the next ring on, rinse & repeat. When you finally get to the last ring on it’s time to bust out the big hammer drill and get whole mess bolted to the ground. Then comes the important (but not pictured) step of sealing the bottom of the bin to the concrete with a big bucket of roof cement.
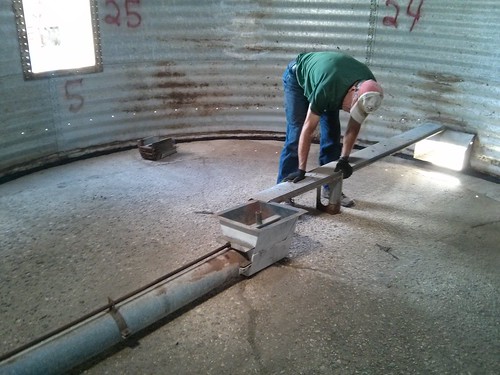
Then comes the real fun, at least for us. Actually, scratch that part about fun. Assembling the drying floor was not fun. I really wish we’d have thoroughly marked the floor with several cans of spray paint before we disassembled it. That would have saved lots of head-scratching during reassembly.
After plenty of futzing and a bit of finagling, we ended up getting it all together. A judicious application of power tools helps greatly.

Found this on the door. Looks like it has been a little while since this grain bin was in serious use.
How did you stake them down? And how did you fasten the 12′ brace to the top of the A frame?