
Any farm needs some sort of workshop area. Farms usually have some sort of mechanical equipment, and that equipment will inevitably need to be worked on. In addition, there’s usually a bit of woodwork that needs to be done on a fairly regular basis, be it birdhouses, poultry pens or whatever.
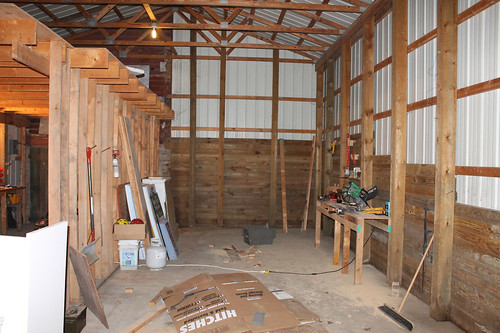
We’ve got this big Pole-building garage that’s been tacked on to the front of the barn. It’s 2.5 to 3 times deeper than it needs to be to park a car, so that’s a lot of room to work with inside.
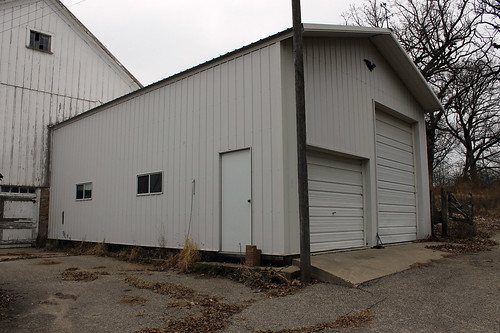
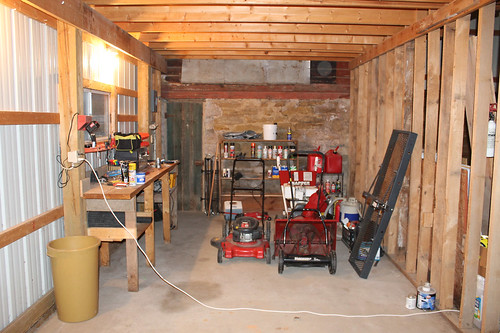
I’ve designated the first bay for mechanical stuff. Maintenance on cars, trucks, snowblowers and any other mechanical or electrical bits that need working on. This is the only bay that has electrical outlets, and the one with the majority of the light fixtures. A few 4′ shop lights would be a welcome addition.
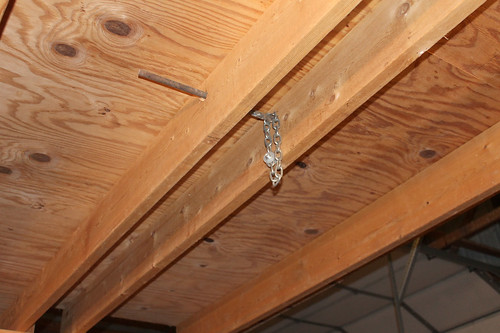
The 2″x 12″ rafters overhead can be used to hoist an engine in a pinch, in fact, there is a chain hanging from between two closely spaced rafters that looks to have been used for that very purpose.
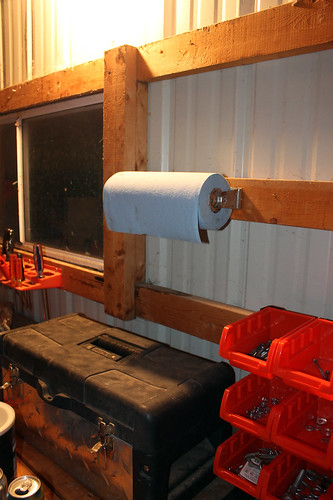
And I found an old paper towel holder in the basement that will do just fine as a shop towel holder for the workshop. There’s nothing worse than fumbling around with two greasy hands trying to get at the shop towels.
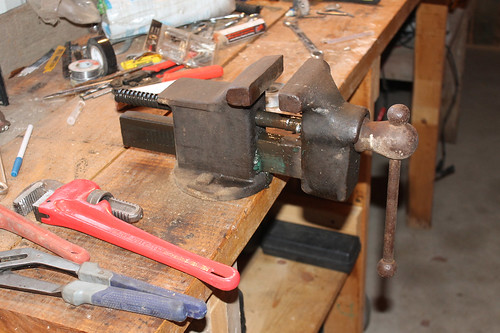
And then there’s this sweet old bench vise that was out in the woodshed. I can see this coming in quite handy. The woodshed sure dosen’t need it anymore, all I’m keeping in there is firewood, garden tools and the chainsaw.
The other bay, the one with the big RV-sized door will be for woodworking stuff. I should be able to put together some fairly big stuff (like broiler pens) without worrying about getting it out of the garage.
Over on the left side of the bay (at least in the above photo) I’m thinking of putting in a lumber storage rack like this one:
One of the things I knew I wanted to have was a full-sized miter saw table. I’ve had this particular 10″ miter saw for years, but using a miter saw without adequate supports on either end lends itself to some stupid maneuvers to get longer boards cut. Now I’ve got a 8′ table to support lumber as it’s being cut, with clearance for 12′ boards on the back end of the saw. No more puttng hands or feet close to the blade just to get a straight cut.
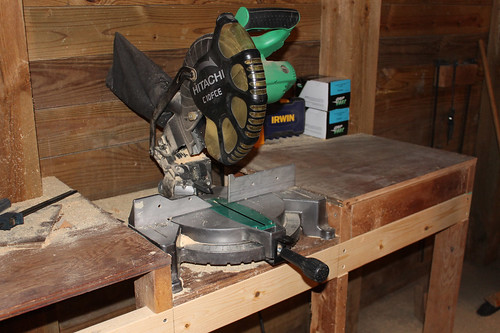
If you’ve used a miter saw before, then you probably noticed that they tend to accumulate a ton of sawdust around them. The bag catches some of it, but you’d need a vacuum hooked up to the saw to catch all of it. One of these neat Rockler automatic vacuum switches is definitely on my wish list. First I’ll have to wire up a few outlets over on this end, as I’m currently powering the saw with an extension cord from the other bay.
I have to have some sort of system for organizing and storing all my tools. Previously I’d just fasten a sheet of plywood to the wall and hammer in finish nails to hold all my tools up. To make sure I put them back in the right place I’d draw an outline around the tool in permanent marker.
This posed one big problem: what do you do when you get a new tool? You pretty much have to find an empty spot and stick it there, weather or not it belongs. Or you can pull out all the nails, paint over the outlines and start from scratch. Not pretty either way.
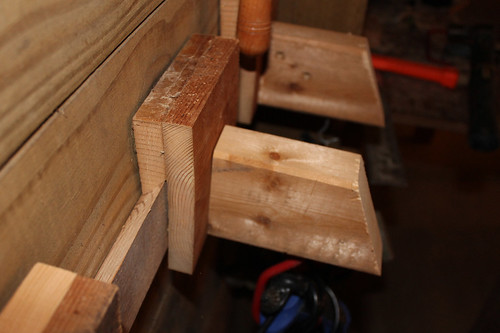
After a little bit of poking around online I found the answer: the french cleat storage system. You can build it yourself from whatever dimensional lumber you’ve got laying around, it’ll hold a lot of weight, and you can reposition any part of it whenever the mood strikes. The kitchen cabinets in our old house used to be mounted with french cleats made of metal. I thought they were pretty genius, but it never occurred to me to make them out of wood…

I put together a few of these little guys with bicycle hooks in the bottom. They will hold all sorts of power tools, and since I can put them together for a little over the cost of a bicycle hook ($0.78) they’re cheap as can be. And did I mention re-positionable? I feel like I need a few more tools now.
So the shop area is all coming together, albeit slowly. I’ve still got to incorporate a space for lumber storage between the bays, do a bit of wiring, etc.
Do you have any great ideas that I should incorporate into the shop?