
So I made some pastured poultry pens last year, and they worked out pretty well, even though we had trouble with the recycled tarp that we used to cover it.
But something was bugging me. The cattle panels we used to build the pens were too heavy, and too expensive. There just had to be a better way…

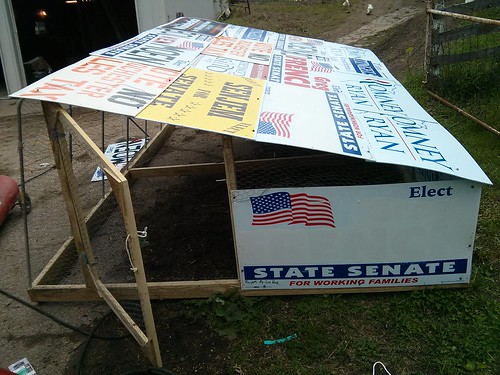
Enter the new 2013 Green Machine Pastured Poultry Pens!
The base is nearly the same as last year: 2×6 runners with 2×4 cross-members, but I’ve scaled it down to 12′ x 8′ in size. That makes for a 96 square foot pen, which should be enough room for about 75 chickens.
The main structure of the shelter is made from 1/2″ EMT conduit. The highest (front) side is about 4′ tall, and the rear side is 2′ tall. Conduit is very lightweight, cheap and rigid. It’s pretty much the perfect material for making these pens.
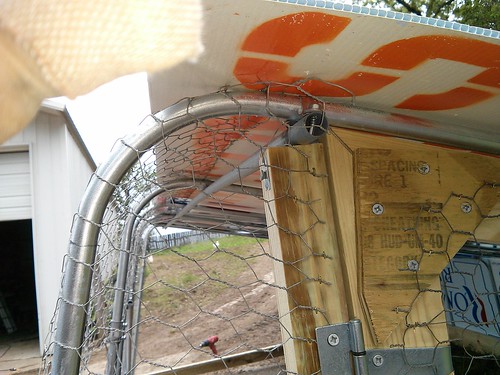
With one stick of conduit connecting all the “ribs” at the top, and one diagonal brace connecting the three center “ribs” the structure is quite stiff, even without all the coroplast installed.
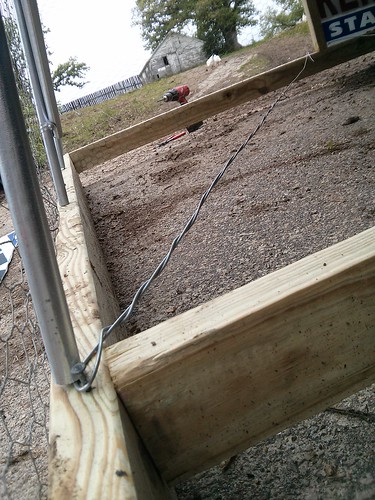
I added two brace wires to the interior, which stiffen the base and keep it from squashing itself into any non-square shapes as it’s being pulled around the pasture.
Speaking of pulling around the pasture…
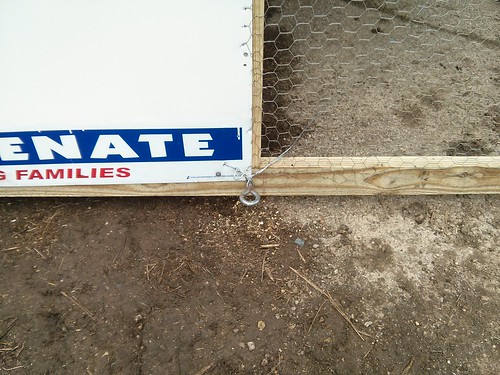
Both brace wires are anchored to this nice big eye screw, which is a handy place to hook on to drag the pen around.
The pen is, of course, clad in what may be one of the more unusual looking materials: free coroplast.
Coroplast is tough, waterproof, rigid and have I mentioned free?
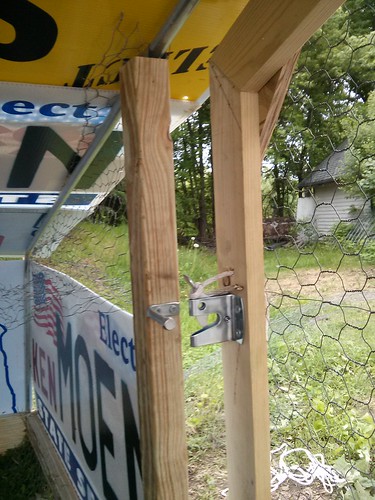
And I always make sure to put a good door on my pens. If you’re going to be getting in-and-out of a pen several times each day, then it’s worth the expense to put a latch and hinges on the door. It takes a bit longer to build, but if it saves you 15 seconds each day, then it will save you 90 minutes in the first year you use it.
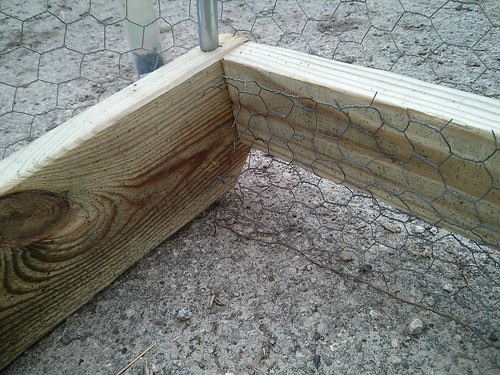
On the inside, I make a “sweep” of scrap chicken wire to close the gap below the 2×4 crossmembers. This keeps predators out, while making the pens easy to drag around the pasture. Also, reduces the chance of a chicken being hurt if they are straggling behind while the pen is being moved.
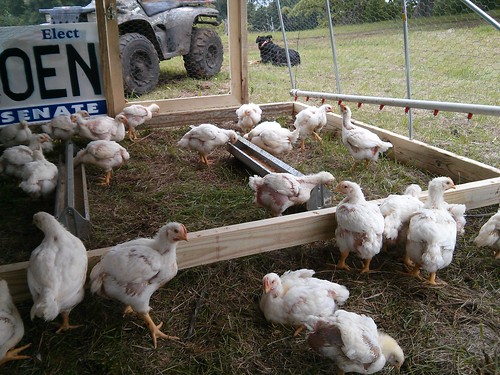
The chickens were moved out on pasture today, and so far, they’re loving their new home!
Total Cost:
Lumber – $21.69
Conduit – $15.60
Fasteners – $6.29
Total – $43.58
(Not counted: nails, screws, latch and chicken wire. Because I already had all that stuff lying around.)
Last years poultry pen cost $48.00 more, was heavier and less rigid.
EMT conduit > Cattle panels!
That is impressive! The election signs add a magical touch.
Are those signs going to survive a heavy wind?
The signs ought to hold up, they’re fairly sturdy, unlike last years tarp. The mish-mash of campaigns and political parties sure makes for a unique look. I’ve already had suggestions to put the political signs on the bottom of the pen, so the chickens can poop on them.
Hello,
Sorry, if I missed it but how do you attach the conduit to the 2×6″ boards?
Like this design a lot, I want to make one.
Thanks,
Michael
We drive a large nail (approx. 4″) half way into the 2×6, leaving about 2″ sticking up. The conduit then sits over the nail.