
I’ve been using Little Giant double-wall poultry founts for several years. They’re the best commercially-available founts that I’ve found so far, but they leave a lot to be desired. The double-wall founts are durable, large-ish capacity (2, 5, and 8 gallon varieties) and have the ability to be used with a heated base to keep them from freezing up in the winter. I’ve been using a 5 gallon fount with a heated base all winter, and I’m getting tired of it.

Chickens are absolute masters at finding creative ways to poop in their own water, which they do quite easily with the double-wall founts. That big lip on the bottom must make an awfully inviting chicken-poop target because they seem to hit it with some regularity. Getting the fount off the ground helps, but you can’t hang the bigger 5 and 8 gallon founts by the handle, per the manufacturers stern warnings.
Plus, at this point, I’m refilling the 5 gallon fount every day. Our 55 or so chickens totally drain it when it gets cold, which makes the heated base not work so well.
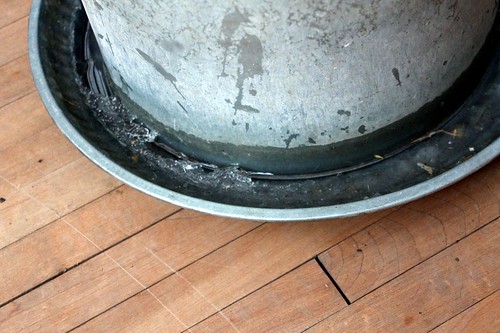
To it’s credit, the heated base is only rated to keep the thing thawed to 10° which is pretty accurate if you keep the fount full of water.
However, here in Minnesota we’ve got our share of days that don’t see a high temperature of ten. On the coldest days I’ve been out trying to defrost the thing with a propane torch enough to get it open so I can refill it. That’s easier said than done, especially at -10° when my propane torch quits working due to the cold.
Grrrr..
Anyhow, this got me thinking about making a new mega-chicken-waterer. I used some small nipple-waterers last summer with the broiler chickens with great success. Chickens, in spite of all their pooping creativity, cannot figure out how to poop on one of these little things. But what vessel to attach them to?
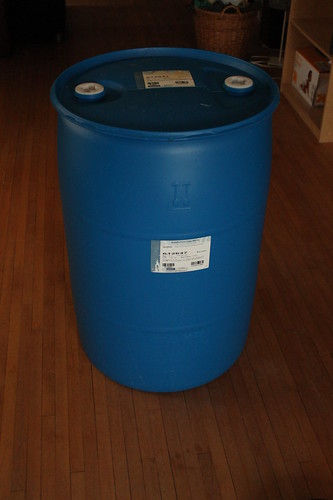
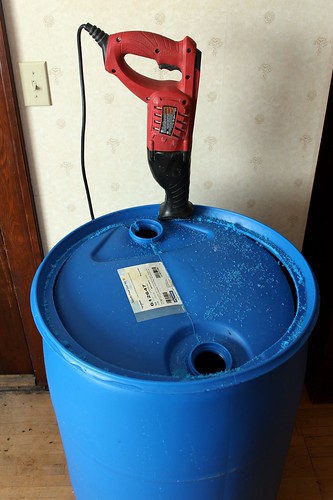
This 55 gallon plastic barrel ought to do quite nicely. You’ll want a food-grade barrel, you know, one that used to hold some sort of food product. This one used to have Anatto food coloring in it. Back in the day I got one that had caramel flavoring from a Quaker Oats rice-cake factory. It smelled purdy.
Then get yourself a few of these bad boys.
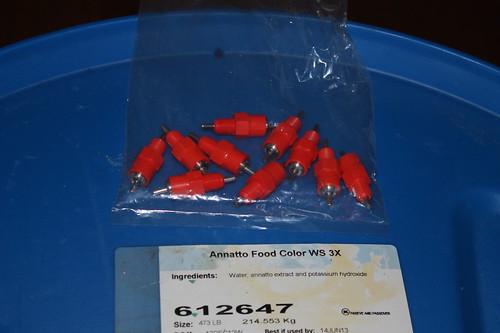
I got 10 of them for this particular waterer. They’re supposedly good for 10-12 birds each, so that should put me at a 100-120 bird capacity with this one waterer.
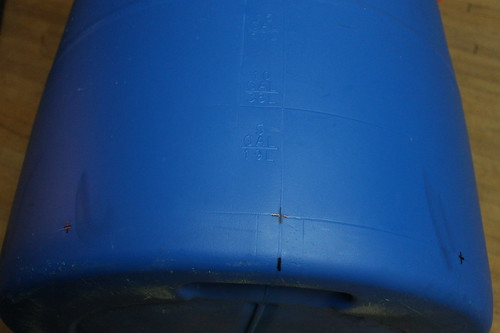
So there are already some handy rings around the barrel demarcating the volume. All that’s left to do is mark 10 evenly spaced holes to be drilled.
I measured the circumference of the barrel with a string, then measured the string: 71 inches. 71/10=7.1
So if we make a mark every 7 1/8″ then we oughtta be pretty close to evenly spaced. An alcohol prep-pad totally takes off the permanent marker if you screw up like I did…
Anyhow, then you gotta drill some holes. Ten of them to be exact. You need a 11/32″ drill bit for the job. I know it’s a strange size, but don’t risk the leaking, just go get one.

Now it’s time to install those little dudes. Get them all doped up first.
Yes, pipe dope, a.k.a. Teflon pipe thread compound. It’s thick and pasty, it seals better and is generally a lot less of a pain in the butt to use than Teflon tape.
Now about getting all that water in there…
Let’s cut a big hole in the top, shall we?
That ought to help fill it up with water. But what about the freezing? That’s what stock-tank de-icers are for. I’ve got one for the pigs that I really like. It’s made by Farm Innovators and the guys at the local Co-op say they’re the bees-knees. They look well-built, and the pigs water has remained very liquid even when it’s -10° so I’d say they’ll probably work for the chickens as well. The box claims that the 1500w heater will keep 50 gallons of water ice-free down to -20°. That oughtta work.
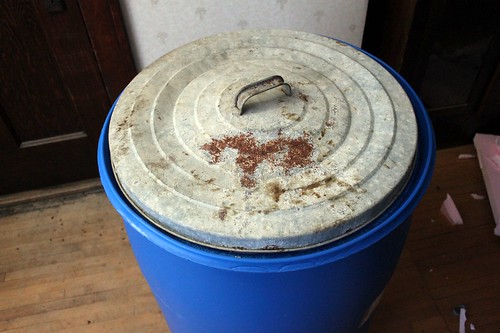
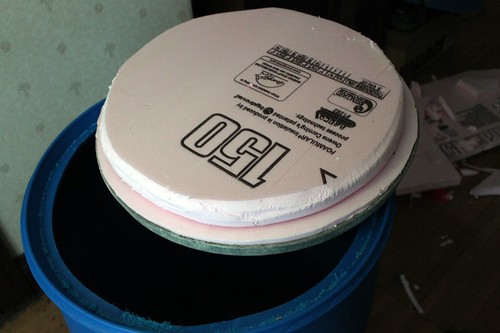
To save some energy I wanted a cover for the top. Heat rises, and if I can at least insulate the top then it will cut down on the energy needed for the de-icer. I thought about making a lid out of 1/2″ plywood, but then I found this handy-sized trashcan lid just lying around.
With a few chunks of pink foamboard insulation under the lid, we ought to be in good shape. I’ll probably end up wrapping the barrel with insulation at some point like bubble-foil or just a water-heater blanket.
All that’s left to do is move it out to the barn, plug in the de-icer and start hauling buckets of water.
Lots of buckets of water…
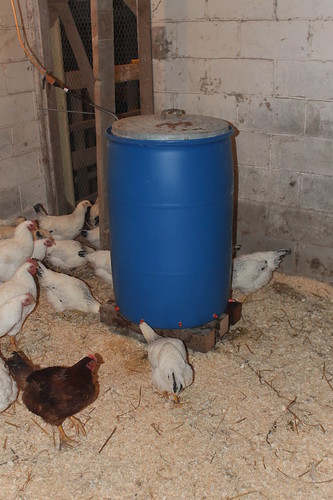
I was a bit worried when I first started using the nipple-style waterers that the chickens wouldn’t figure them out. That’s never actually been a problem. They see the bright red nipples and their curiosity gets the best of them. The chickens actually seem to enjoy messing with the nipples, so much so that they waste a bit of water for the first few days, then the novelty wears off and they get on with their lives.
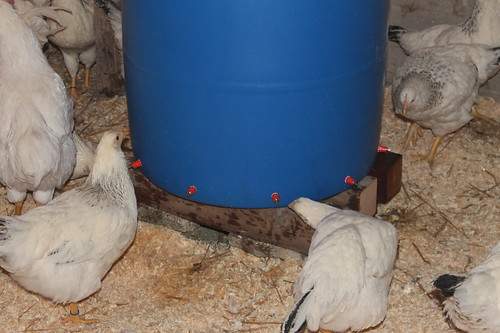
This is the first time I’ve used the nipples in a horizontal position. They don’t actually leak any water, but it seems that the chickens are wasting a little more because the water doesn’t “flow” down to the end of the plunger like it does when it’s all pointing down at the ground. I don’t want to have as much water wasted as there’s been in the past few days. It’s not enough to make any difference in how much I have to haul out to them, but it’s enough to wet the woodchips under the waterer. I’d like to keep the chips dry.
It may be a matter of raising the barrel up higher or it might call for a rebuild with another barrel, pointing the nipples down at a slight angle.
We’ll see how it goes.
UPDATE: see Chicken Mega-Waterer v1.2 for the most recent version.
Great ideas Andrew, keep up the good work!
That is the biggest chicken waterier I have ever seen. You always come up with some creative ideas Andrew. Keep us up to date how it works.
You might be able to plug the holes you have made and attempt to insert the droppers at an angle between the existing holes. That way you don’t waste the barrel.
I did the same mistake with barrel. You need nipples under the barrel not on side.