Just a year or so before we sold our farm in Missouri we installed a couple of neat livestock water tanks made out of old tires. They worked really well, and ever since moving up here we’ve wanted to try another tire tank to see how it would work in our new colder climate.

We procured a tire last year from a tire dealer in a neighboring town. This particular tire is the biggest one they had at the time, a flotation tire off of a Kuhn Knight manure spreader. The tire had been patched several times, but had ultimately suffered a puncture that wasn’t reparable. Tire places have to pay to dispose of old tires, so they’re usually more than happy to give them away to anyone crazy enough to want one. So we ended up with a tire that’ll hold 200+ gallons of water for free.
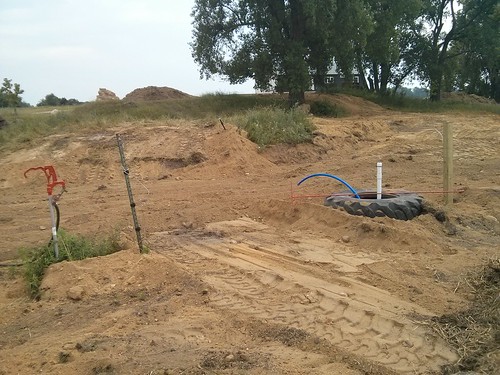
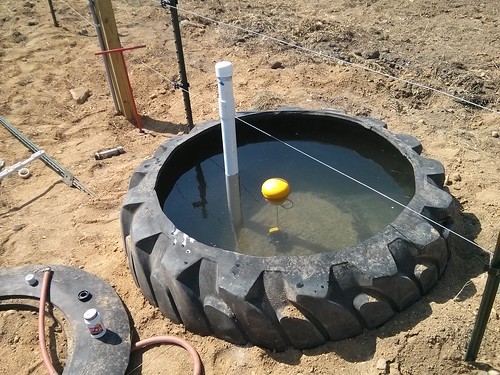
There was already a backhoe here on the farm for a few days, ostensibly here to dig in a water line to my parents new house (just visible behind the trees at the top of the hill). While they were already here we had them dig a little hole to put a rather large tire in.
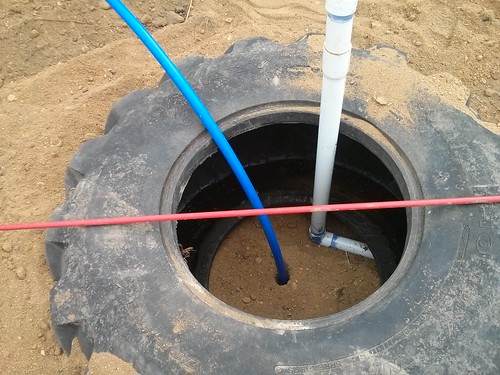
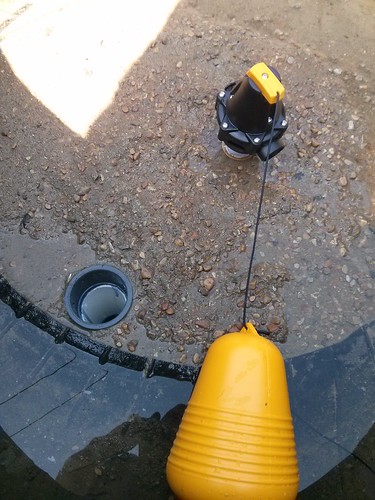
In the middle of the tire we left a 1″ PEX water line sticking up, as well as a 2″ PVC drain line. The drain line has been buried so that it eventually empties 100′ or so out into the pasture.
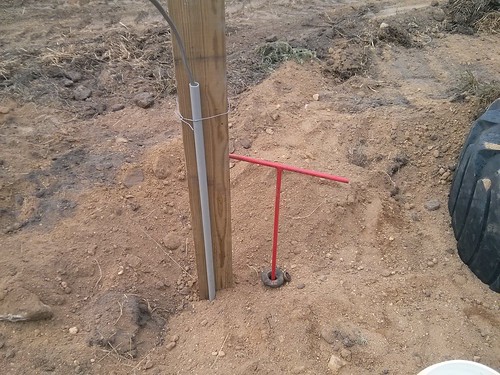
The PEX water line is controlled by this nifty “stop & waste” valve that is buried 6′ underground. To turn the valve on and off you just use a (provided) 7′ long handle to reach down and turn it. In Missouri we made our own underground valve out of PVC, but this bought valve is quite a bit nicer, it drains any extra water in the line after you close the valve which is a nice feature if you’re anticipating any very cold weather.
The wooden post next to the tire has a wire that has been fed from my parents house. This will give us the option of installing a de-icer in the winter if we need to.
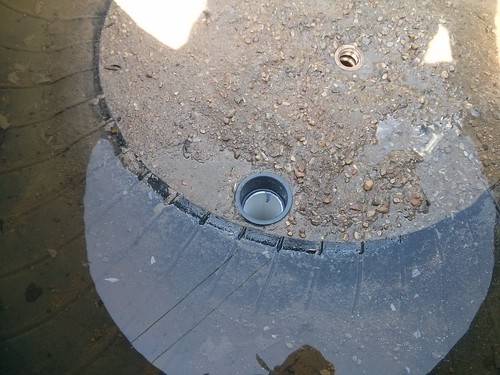
With all the plumbing in place it’s on to making the whole thing hold water. We poured a few bags of dry concrete-mix into the hole and filled the tire with a couple inches of water to set the concrete. After a day or two of curing, it was time to install the float valve.
After patching the one remaining hole in the tire, it was time to fill it all up and see if it works. Luckily a water tank puts a lot less pressure on a tire than holding air and several thousand pounds of manure, our impromptu patch job seems to be doing the trick.
In the next few days we’ll fine tune the float level and then, when we’re happy with the water level, we’ll cut the drain pipe off. The drain pipe will end up being a 1/2″ or so above the water level, but still below the top of the tire. That way, if the valve ever fails “open” the excess water will all flow out of the drain, instead of over-topping the tank itself. The drain pipe isn’t glued into place, so in the event that we’d want to drain the tank we just close the stop & waste valve, and pull out the drain pipe.
That’s really ingenious, Andrew!
That’s genius! Does keeping it below grade help prevent freezing?
It should help keep it all a bit warmer for longer. Last year we had frost down to 4-5′ so the water in the tank will freeze. The stop & waste valve (and PEX waterline) are 6′ down so they shouldn’t freeze unless we get one heck of a cold snap.
We are sure hoping that being a little bit below grade will help. We get a frost-depth of +4′ here in Minnesota when during a bad winter, so an extra 1′ of burial won’t help us the entire winter, but it ought to extend the “season” a bit.
What is the brand name of the float valve?
We get it from a place just down the road, never knew the brand name of it, perhaps they could tell you.
https://www.kfence.com/watersystem