As our farm continues to grow we find ourselves outgrowing some of the equipment that we started with. This time it’s the pastured poultry pens.
The old model (v2.1) is still a great bit of equipment if you’ve got lots of time and not a lot of money. After all, the coroplast election signs are free and the rest of the materials only add up to about $50 per pen.
The downside is that the old pens aren’t the sturdiest things around. After a two years of wind, snow and the incessant meddling of wayward cattle, the coroplast pens were in need of major refitting if they were to see another year of service.
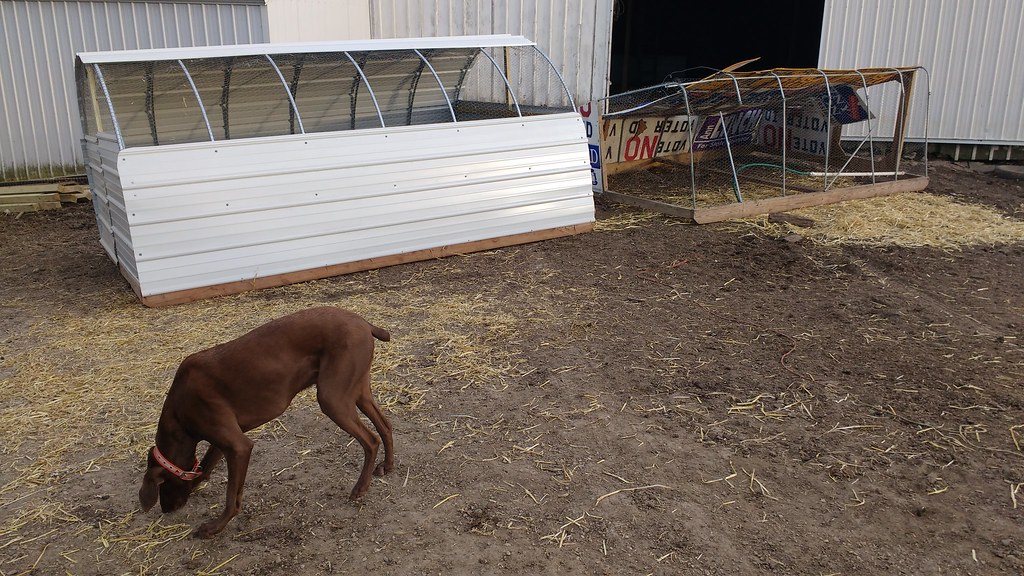
Witness the exquisite condition of the old pen (on the right) compared to the new v3.0 pen (on the left).

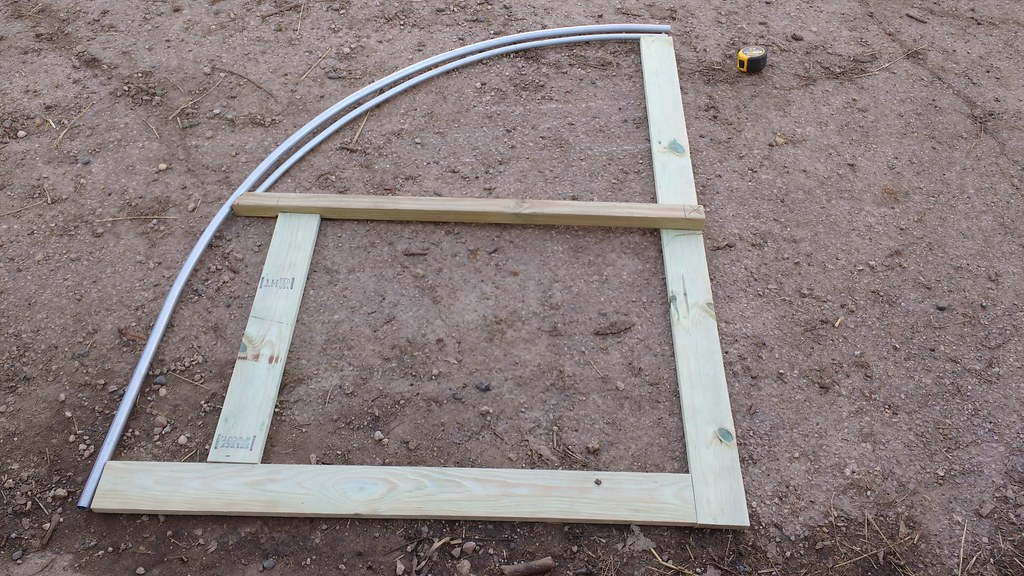
We started with the same base as the old v2.1 pen. A pair of 2″x6″x12’s for the runners and three 2″x4″x8’s to tie it all together. The footprint is 8’x12′ and we’ve been pretty happy with that size. It’ll house about 50 full grown broilers when moved daily. If you’re hurting for space you can get 75 birds in a pen, but you’ll have to move it twice a day.

Once you’ve got the base squared away it’s time to dust off that hoop-bender you built.

Get 14 or so sticks of 3/4″ EMT conduit and mark them at 12″
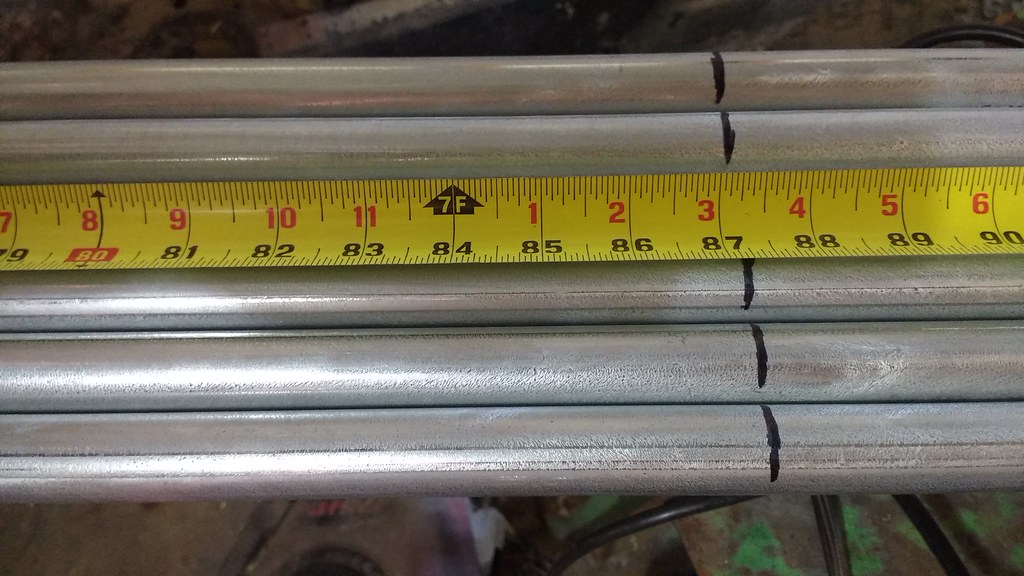
and at 87.25″ then make like Bender Bending Rodríguez and, well, bend them. The bend should start at the 12″ mark and continue to (or a bit past) the 87.25″ mark.

After bending, cut the hoops at the 87.25″ mark and you should have something like this.
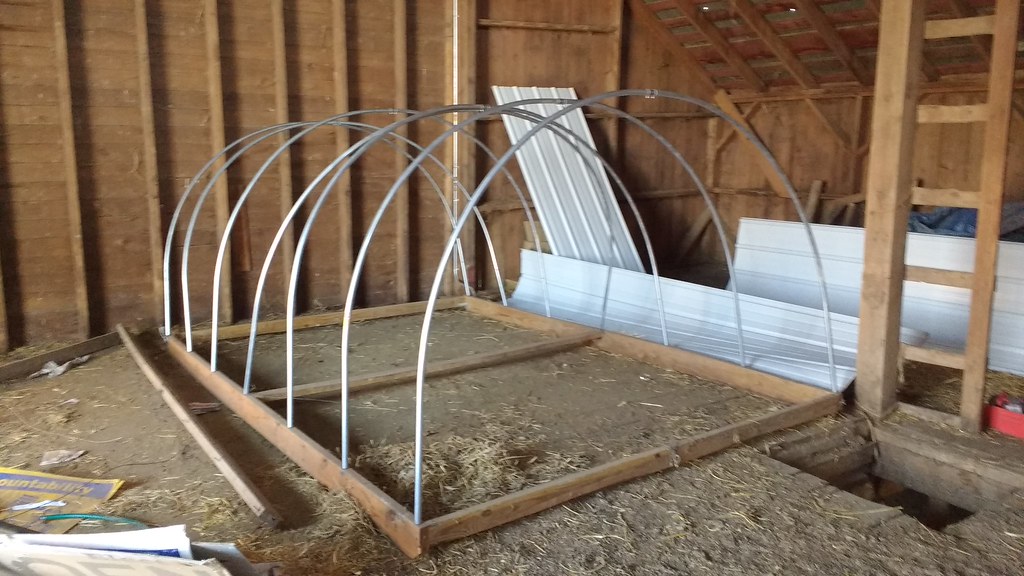
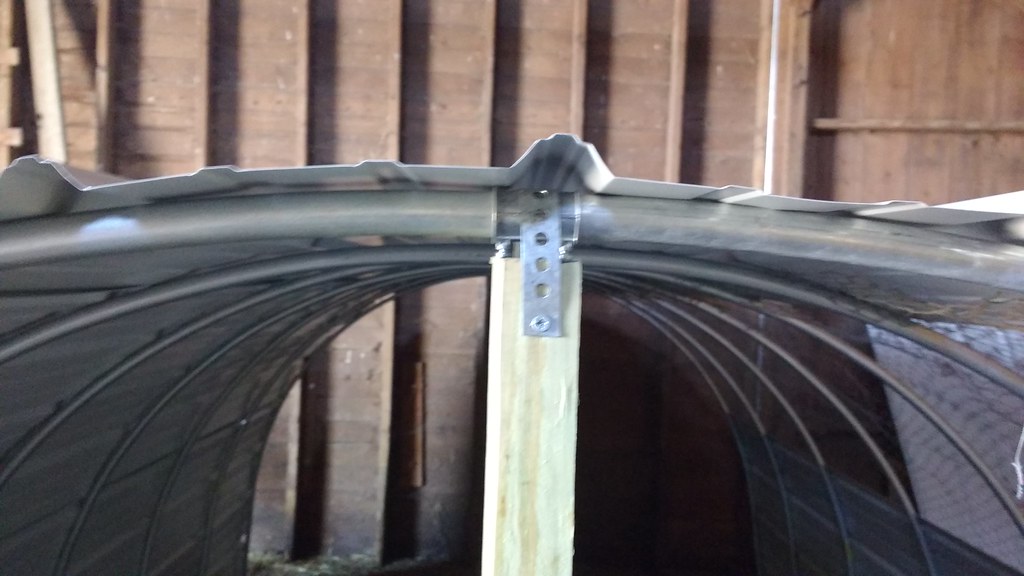
Now take two of those hoop-halves, connect them with a 3/4″ conduit union and set them arrange them on the base thusly.
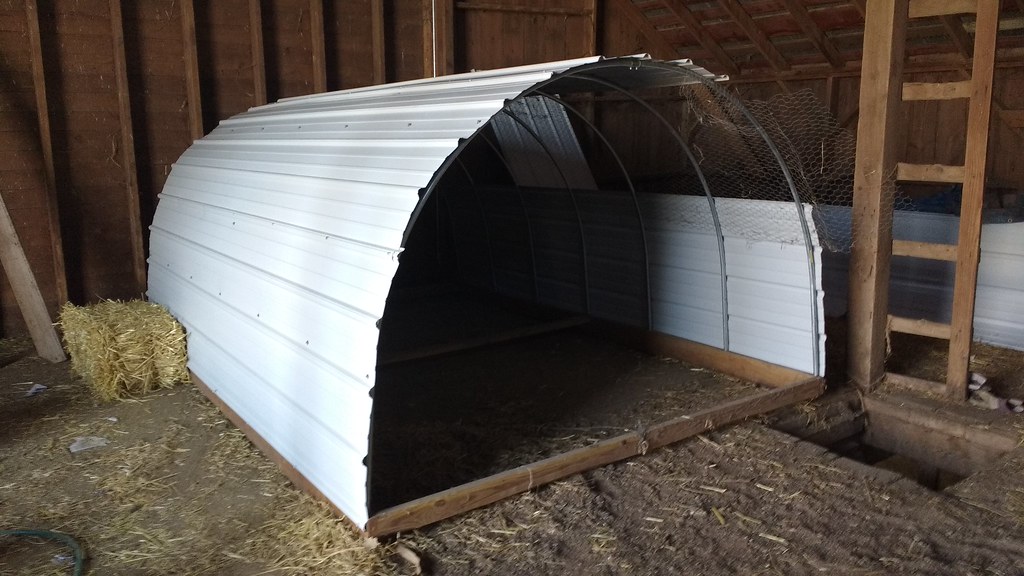
Cover the structure with 4 sheets of 12′ steel roofing and fill in the gap with chicken wire. No need for additional bracing, the EMT and steel roofing provide ample rigidity.

One big change for the v3.0 pen is that there is no chicken wire down at pig, predator & dog height which ought to help keep the chickens a bit safer. It should also keep them more comfortable as the young broilers benefit from having a solid windbreak, and the older broilers like to have plenty of shade.

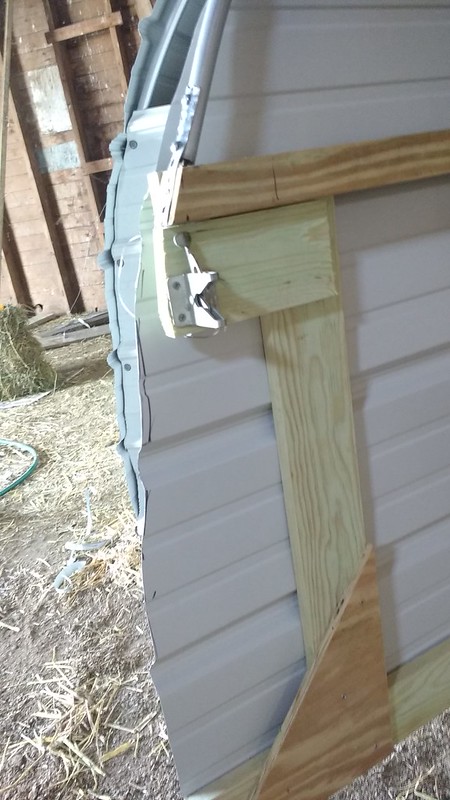
Now to fill in those ends. They get the same treatment, sheet metal on the bottom, chicken wire on the top, but there is the small matter of providing a structure by which to attach said material.

I like 2×2’s for this purpose, really 2×4’s that I’ve ripped in half because that’s cheaper.
And have I mentioned copious bracing? Bracing is awesome.
While one end is almost frighteningly easy, one end has a door in it, which takes more time than anything else to get put together.

The door is going to be quite a bit bigger on the v3.0 pens, witness the old v2.0 door sitting on the new v3.0 frame. The center height of the new pens is right about 5’6″ which is a marked improvement over the old pens which required a lot of stooping and crouching to get inside.
Building an odd-shaped door is always lots of fun. But at least the rigid metal skin on the bottom half makes it a lot easier.

The top half of the door will be chicken wire, so I decided to use a spare bit of 1/2″ EMT conduit to make the top curve of the door.

Braced copiously of course.
And then find a nice spot to mount the door latch.

And the strike.

And suddenly you’ve got a door. A nice big door. Good for carrying those big 4′ chicken feeders through.
The best part is that the chickens can no longer see you (the farmer) through the door. When broiler chickens, which are bred to have voracious appetites, see you coming they quickly pile up against the door that you’re approaching. The new door should stop all that sillyness and let me get through the door without so many chickens underfoot.

A bigger door also allows us to move the water bucket inside, which means that the cows can no longer continue their campaign of water thefts and waterer sabotage that they’ve been waging against the chickens. The cows will now have to walk an extra 100 feet to drink from their water tank, the poor dears.

After the first pen was completed it went out in the barnyard for torture testing. The pigs and cows quickly put it through it’s paces as a scratching post. It has survived without any damage whatsoever, which is a huge improvement.
The new pens are equal parts more expensive and heavier than the old pens. The expense is now something like $150-175 per pen. That’s still eminently reasonable given the huge increase in durability, but if you’re bootstrapping yourself into a new farming venture the v2.1 pen is still a good option at less than $50. Just be aware that the v2.1 pens are not going to last long, especially in a mixed-livestock situation.
The biggest downside to the new pens is that they’re significantly heavier. All that extra metal means that it’s no longer feasible to drag these pens around by hand without a little help. I think one of the Salatin-style dolleys might be in order.