I thought I’d give a quick rundown of our electric gates for any farmers or other folk out there on the interwebs who might find it useful.
There are pretty much two kinds of gates for electric fences: conducting and non-conducting.
We much prefer non-conducting gates when at all possible. Non-conducting gates are “dead” as soon as you unhook them, meaning that you can open the gate and lay it on the ground without fear of shocking yourself. This also means that that the entire electric fence system won’t be shorting out while the gate is open and it won’t make a snapping sound that will scare the livestock.
To have a non-conducting gate you either have to string a conductive wire overhead or bury it underground.
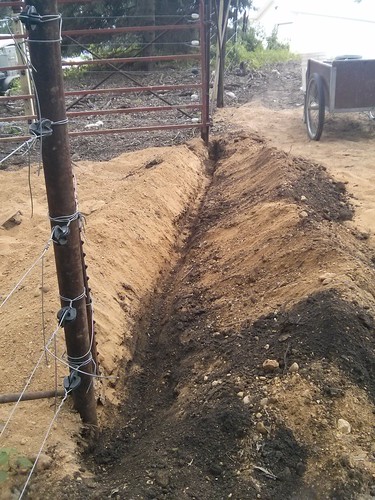
We bury most of our electric gates because it’s less of a hassle getting big equipment over a buried line than under an overhead line. In theory you should bury your conductive wire below the frost line. Here in Minnesota that means 6′ down, which ain’t gonna happen. We go for about a foot down.
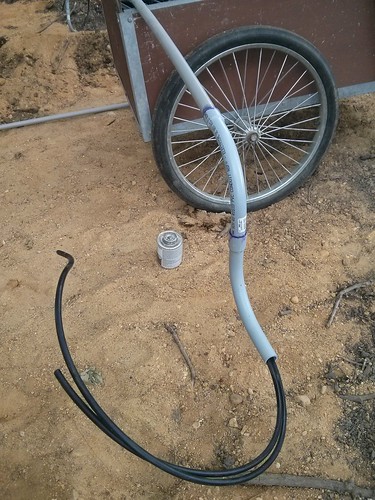
Just deep enough to fit all this. We use 3/4″ PVC conduit with 2 sweeps on each end. This gives us plenty of space and protection for a single insulated 12.5 gauge wire. In the above photo it’s all dry-fitted together to check that it works out to about the right size.
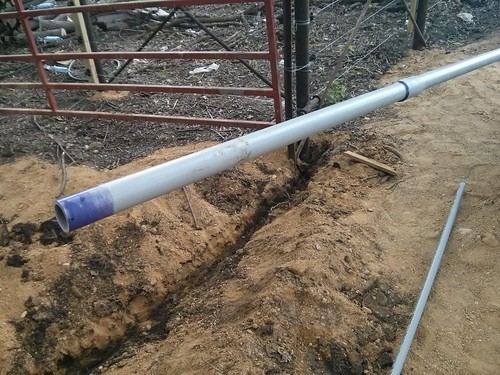
Prime and glue the straight bits together first, then snake the wire in, leaving plenty extra sticking out each end.
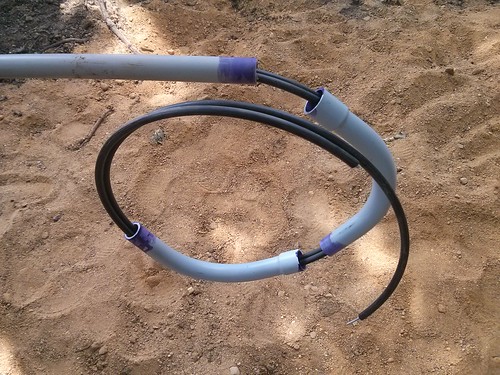
Then slip on the already-primed sweeps. In this instance we’re using two electric wires. This particular gate is for our 5-wire lot fence. Due to the heavy weed loads in spring and heavy snow loads in winter we have the bottom two wires on a separate cut-off switch which requires a separate wire for power. I’d like to try a flood-gate limiter for the bottom wires eventually.
With all the wires snaked through, it’s time to glue up the conduit. Snaking two insulated wires through 4 sweeps would be nearly impossible if you were to try it after gluing.
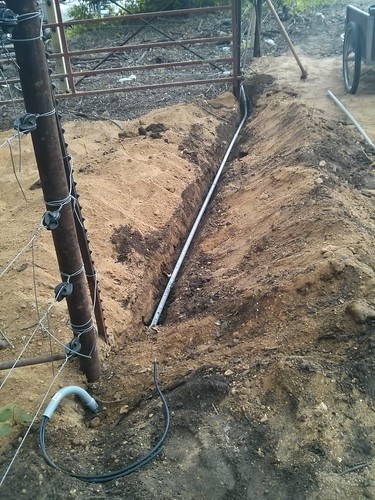
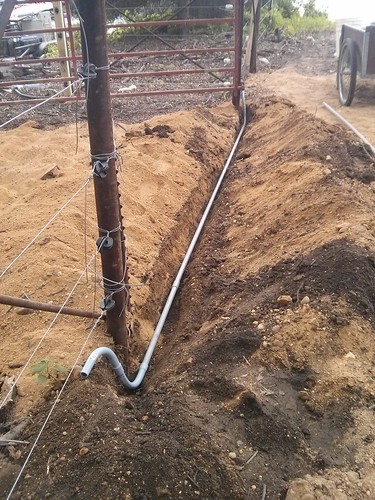
Once it’s all assembled, put it in the trench and bury it. Due to the uneven ground at this gate, we hauled in a few loader-buckets full of sand to even things out a bit. It makes the digging much easier.
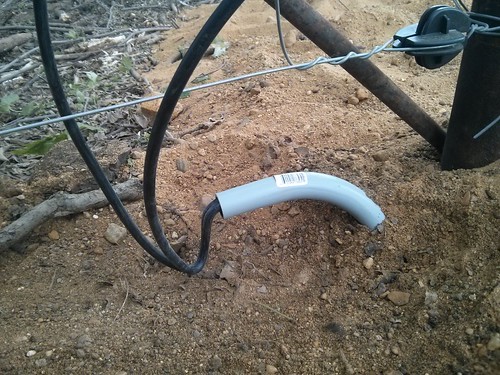
Before making the electrical connections you’ll want to bend a drip-leg into the insulated wires. This makes any water that runs down the wire drip off onto the ground instead of running into the conduit. For bonus points seal up the ends of the conduit with some silicone caulk.
Now finish it all off with a gate!
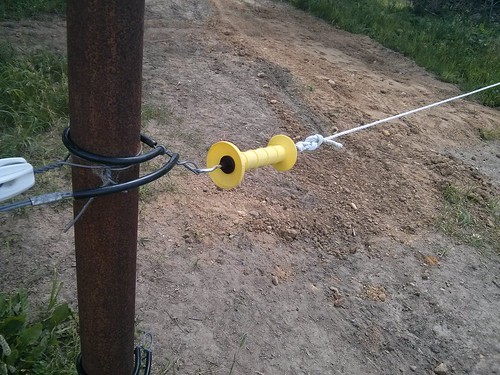
We just started using electric rope for our non-conducting gates. It’s beefy, somewhat stretchy, and best of all visible. I have yet to blow through an electric rope or tape gate with the ATV, something I cannot say about wire gates.
Just tie a handle onto a length of electric rope with a figure-8 knot. The figure-8 is as strong as the rope itself and is easily adjusted. Throw an insulator on the “hinge” end of the rope and you’ve got yourself one heck of a non-conducting electric gate.
Thanks for showing us step-by-step how you do this, Andrew. It looks good and gives me ideas.
Thanks for sharing this ideas I’ve been watching this on YouTube and reading this blog. Very informative.